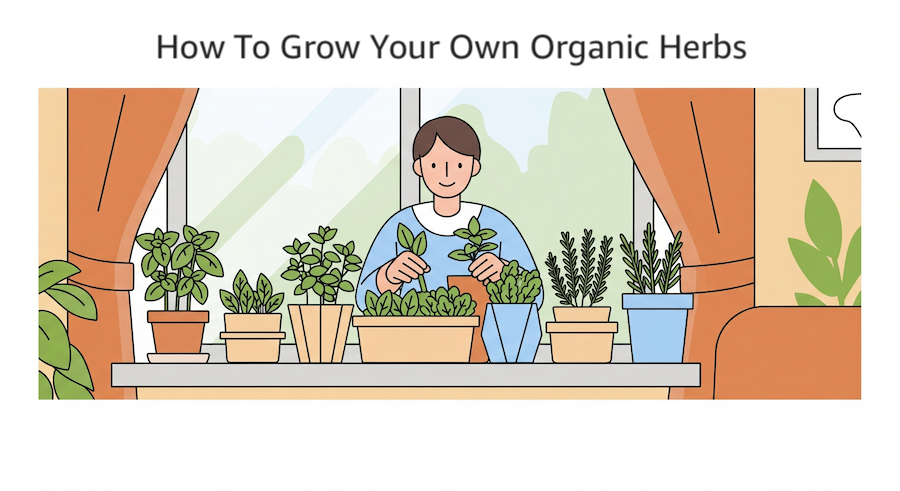
Unleash Your Inner Gardener: 5 Foolproof Steps to Growing Organic Herbs Indoors
Unleash Your Inner Gardener: 5 Foolproof Steps to Growing Organic Herbs Indoors
I still remember staring at that wilted basil plant on my kitchen counter, feeling like a complete failure. Three weeks and $15 worth of “fresh” herbs from the grocery store later, I was ready to give up on the whole idea of growing my own food. But then something clicked when my neighbor shared a single cutting from her thriving mint plant, and that tiny sprig changed everything.
Fast forward two years, and my windowsill is bursting with fresh homegrown herbs that have transformed both my cooking and my confidence. I’ve discovered that anyone, yes, even you can successfully grow herbs indoors with the right approach. You don’t need a green thumb, years of experience, or even outdoor space.
What you need is a simple, proven system. Today, I’m sharing the exact 5-step method that took me from herb-killing novice to someone who harvests fresh basil, thyme, and chives daily from my small space gardening setup. These aren’t just tips, they’re the foolproof steps that guarantee success, even if you’ve never grown anything before.
Why Every Home Cook Needs an Indoor Herb Garden
Before we dive into the steps, let me share why this journey is worth it. When I calculated the savings from my first year of organic herb gardening, I was shocked. I saved over $400 compared to buying fresh herbs at the store. But the real magic happened in my kitchen.
That first time I snipped fresh oregano directly into my pizza sauce, the aroma was so intense it filled my entire kitchen. The flavor was incomparable to anything I’d ever bought dried or even “fresh” from the store. These herbs had oils at their peak potency because they were harvested seconds before use.
Beyond the incredible flavor and savings, there’s something deeply satisfying about nurturing life. My daily herb-checking routine became a moment of calm in busy days. Plus, knowing exactly what went into growing my food, no mysterious pesticides or chemicals, gave me peace of mind, especially when cooking for my family.
Step 1: Choose Your Herbs Wisely (Start with the “Big 5” Winners)
Here’s where most beginners go wrong, they try to grow everything at once or choose finicky herbs that challenge even experienced gardeners. I learned this the hard way after killing three rosemary plants in a row! Success starts with selecting herbs that are almost impossible to kill and incredibly rewarding to grow.
The “Big 5” Beginner-Friendly Herbs
After helping dozens of friends start their own indoor gardens, these five herbs consistently produce winners:
1. Basil: Your Gateway to Success
Basil was my first real victory, and I recommend it to everyone starting to grow herbs indoors. Sweet basil grows incredibly fast, loves the warmth of most homes, and gives you constant harvests for 3-4 months. The key is pinching off flower buds immediately, this keeps the plant producing tender leaves instead of going to seed.
Pro tip: Start with sweet basil, but once you’re confident, try Thai basil or lemon basil for exciting flavor variations.
2. Chives: The Impossible-to-Kill Champion
If you’ve never grown anything before, start here. I’ve never met anyone who couldn’t successfully grow chives. They tolerate different light conditions, don’t mind occasional neglect, and regrow almost immediately after cutting. I use them on everything from scrambled eggs to baked potatoes.
3. Mint: Vigorous and Versatile
Mint is incredibly forgiving, though I learned to keep it in its own container because it will overtake neighboring plants. I grow both peppermint and spearmint for teas, cocktails, and adding fresh flavor to fruit salads. Bonus: mint actually prefers slightly less sun than other herbs, perfect for east or west-facing windows.
4. Parsley: The Nutritional Powerhouse
Both flat-leaf and curly parsley are excellent choices. Parsley is packed with vitamins A, C, and K, and grows steadily throughout the season. I harvest outer stems first, allowing the center to keep producing new growth.
5. Oregano: The Set-It-and-Forget-It Herb
Oregano is incredibly hardy and doesn’t need much water, making it perfect for busy schedules or frequent travelers. As a perennial, it’ll keep growing year after year with proper care. I use it primarily in Italian dishes, and the flavor intensity beats store-bought oregano by miles.
Herbs to Avoid as a Beginner
Save these for later: rosemary (needs specific winter conditions), sage (can be temperamental indoors), and cilantro (bolts quickly in warm conditions). Master the Big 5 first, then expand your repertoire.
Step 2: Set Up Your Indoor Growing Space (Location, Light, and Containers)
The beauty of small space gardening is that you can start literally anywhere you have decent light. I’ve successfully grown herbs in tiny apartments, basement rooms with grow lights, and even office cubicles. Here’s how to set up your space for maximum success:
Finding the Perfect Location
South-facing windows are gold: My south-facing kitchen windowsill remains prime real estate for herbs. If you have one, you’re already ahead of the game.
East or west windows work too: These provide good morning or afternoon light. I’ve had excellent success with both orientations.
North-facing windows or dark spaces: Don’t give up! This is where grow lights become your best friend. I’ll cover this in detail below.
Container Selection: Size and Drainage Matter Most
I’ve learned through expensive mistakes that container choice can make or break your herb garden. Here’s what works:
Size requirements: Most herbs need at least 6 inches of depth, but 8 inches is better. I use 8-inch pots for single plants and 12-inch rectangular planters for multiple herbs.
Drainage is non-negotiable: Every container must have drainage holes. I’ve killed more herbs from overwatering than under-watering. If you fall in love with a decorative pot without holes, use it as a cachepot with a plastic pot inside.
Material considerations: I prefer ceramic or plastic pots for indoor growing because terra cotta dries out too quickly in heated homes. However, if you tend to overwater, terra cotta’s faster drying can actually help.
Maximizing Small Spaces with Vertical Growing
When I moved to a smaller apartment, vertical growing opened up incredible possibilities for my organic herb gardening setup:
- Hanging planters for trailing herbs like oregano and thyme
- Wall-mounted pocket planters for smaller herbs
- Plant stands that create multiple levels of growing space
- Over-the-sink hanging gardens that utilize otherwise unused space
- Magnetic planters that stick to refrigerators (perfect for renters!)
Grow Light Solutions: Extending Your Options
Not everyone has perfect south-facing windows, and that’s completely fine. I use LED grow lights in my basement and darker rooms to successfully grow herbs indoors year-round.
Modern LED grow lights are incredibly affordable and energy-efficient. I run mine for 12-14 hours a day using a timer, so I never have to remember to turn them on and off. The herbs grown under lights are just as flavorful as those grown in natural sunlight, sometimes even more so because the light is consistent.
Pro tip: Look for full-spectrum LED lights with both blue and red wavelengths. They should be positioned 12-18 inches above your herbs.
Step 3: Master the Basics of Plant Care (Water, Feed, and Light Management)
Once your herbs are planted and positioned, caring for them becomes a relaxing daily routine. This step is where many beginners get overwhelmed, but I’ve simplified it into three core practices that guarantee healthy, productive plants:
Watering: The Make-or-Break Skill
Watering killed more of my early herbs than any pest or disease. Here’s the foolproof method I developed:
The finger test: Every morning, I stick my finger about an inch into the soil. If it’s dry, it’s time to water. If it’s still moist, I wait another day. This simple test prevents both over and under-watering.
Water thoroughly, then stop: When I do water, I pour until water runs out the drainage holes. This ensures the entire root system gets moisture and prevents salt buildup from fertilizer.
Empty saucers: I always empty water that collects in saucers after 30 minutes. Standing water leads to root rot faster than you’d believe.
Know your herbs’ preferences: Most herbs prefer to dry out slightly between waterings. The exceptions are basil and mint, which like consistently moist (but not soggy) soil.
Light Management: Reading Your Plants
Herbs need 6-8 hours of bright light daily. I’ve learned to watch for these warning signs of insufficient light:
- Leggy, stretched growth reaching toward windows
- Pale or yellowish leaves
- Weak stems that can’t support the plant
- Loss of that intense herbal aroma and flavor
When I notice these signs, I immediately move the plant to a brighter location or supplement with grow lights.
Rotation trick: I turn my pots a quarter-turn every few days so all sides get equal sunlight. This prevents lopsided growth and keeps plants compact.
Feeding: Less is Often More
I feed my homegrown herbs with a balanced, organic liquid fertilizer diluted to half strength every 2-3 weeks during active growth periods. Here’s a crucial lesson I learned: over-fertilizing herbs can actually reduce their flavor intensity. These plants evolved in poor soils, so they don’t need heavy feeding.
My favorites are organic fish emulsion or compost tea. Both provide gentle, slow-release nutrition that herbs love.
Step 4: Harvest Like a Pro (Timing, Technique, and Maximizing Your Yield)
This is where the magic happens, transforming your thriving plants into incredible ingredients for your kitchen. Proper harvesting is actually the best thing you can do for your herbs. It encourages bushy growth, prevents them from getting leggy, and keeps them productive for months.
The Golden Rules of Harvesting
The one-third rule: Never harvest more than one-third of the plant at once. This ensures the plant has enough leaves left to photosynthesize and recover quickly.
Timing matters: I harvest in the morning after dew has dried but before the heat of the day. This is when oils are most concentrated, giving you maximum flavor.
Cut, don’t pull: I use clean kitchen scissors or my fingernails to cut stems just above a leaf node (where new growth emerges). This encourages the plant to branch out and become bushier.
Herb-Specific Harvesting Techniques
Basil: Pinch just above a pair of leaves, and two new stems will grow from that spot. Always remove flower buds immediately to keep leaves tender.
Chives: Cut like grass, leaving about 2 inches at the base. They’ll regrow within days.
Mint: Cut stems just above a leaf pair. Mint grows so vigorously you can harvest almost daily once established.
Parsley: Cut outer stems first, allowing the center to keep producing. Take entire stems rather than individual leaves.
Oregano: Pinch or cut stems just above a leaf node. Regular harvesting keeps the plant compact and productive.
Using Your Fresh Herbs Immediately
Fresh herbs are best added at the end of cooking to preserve their delicate flavors and oils. I keep a pair of kitchen scissors handy and often snip herbs directly into dishes. Here are my go-to uses for maximum impact:
- Basil: Caprese salads, pasta sauces, pizza toppings, and homemade pesto
- Chives: Scrambled eggs, baked potatoes, cream cheese spreads, and soup garnish
- Mint: Fresh teas, fruit salads, lamb dishes, and mojitos
- Parsley: Tabbouleh, chimichurri, finishing soups, and brightening any dish
- Oregano: Roasted vegetables, herb-crusted meats, and Mediterranean dishes
Preserving Your Abundance
When your plants produce more than you can use fresh (and they will!), here are my favorite preservation methods:
Freezing in oil: I freeze chopped herbs in ice cube trays with olive oil. These herb cubes are perfect for adding to soups, stews, and sauces throughout winter.
Air drying: I harvest herbs in the morning, tie them in small bundles, and hang them in a warm, dry, dark place for 1-2 weeks. My laundry room works perfectly.
Herb salt: I blend fresh herbs with coarse sea salt in a food processor. These flavored salts last for months and make incredible gifts.
Step 5: Expand and Sustain Your Garden (Troubleshooting and Growing Your Success)
Once you’ve mastered the first four steps, this final step ensures long-term success and helps you expand your organic herb gardening adventures. Even with perfect care, you’ll occasionally encounter issues. Here’s how to handle them like a pro and keep your garden thriving year-round.
Troubleshooting Common Problems
Yellowing Leaves
This usually indicates overwatering or poor drainage. I check soil moisture with the finger test and improve drainage if necessary. Sometimes it’s just older leaves naturally dying off. I simply remove them and continue normal care.
Leggy, Stretched Growth
This signals insufficient light. I immediately move the plant to a brighter location or add grow lights. Regular pinching of growing tips also helps encourage bushy, compact growth.
Pest Issues
Aphids and spider mites occasionally appear on indoor herbs. I treat them with insecticidal soap or neem oil, both organic options that won’t harm herbs I’ll be eating. A strong spray of water often dislodges minor infestations.
Herbs Going to Seed (Bolting)
I pinch off flower buds as soon as I see them to keep the plant focused on leaf production. If a plant has already gone to seed, I often start fresh with a new cutting or plant.
Seasonal Adaptations
Winter care: Growth slows significantly due to lower light levels and drier air from heating systems. I reduce watering frequency, sometimes use a humidifier near plants, and supplement with grow lights during the darkest months.
Summer challenges: Hot, direct summer sun through windows can actually be too intense for some herbs. I use sheer curtains to filter harsh afternoon light and ensure excellent air circulation with fans.
Expanding Your Herb Empire
Once you’ve mastered the Big 5, you might want to try more challenging herbs or expand your setup. I gradually added:
- Rosemary: Needs excellent drainage and cooler winter conditions (50-65°F)
- Sage: Beautiful silvery leaves and flowers, very drought-tolerant once established
- Cilantro: Grows quickly but bolts in heat—perfect for successive plantings every 2-3 weeks
- Dill: Ferny foliage and useful seeds, but needs deeper containers
- Thyme: Incredibly hardy and drought-tolerant, perfect for Mediterranean dishes
Propagating Your Success
One of the most rewarding aspects of herb gardening is sharing your success. Many herbs can be easily propagated:
Stem cuttings: Basil, mint, and oregano root easily in water. I often start new plants this way to share with friends or replace aging plants.
Division: Chives can be divided in spring by separating the bulbs and replanting.
Seeds: Many herbs readily self-seed. I collect seeds from dill, cilantro, and basil to start new plants.
Your Herb Garden Journey Starts Now
Looking back at my journey from herb-killing beginner to confident indoor gardener, I’m amazed at how these five simple steps transformed not just my cooking, but my entire relationship with food. Starting with organic herb gardening became my gateway to a more sustainable, flavorful, and satisfying lifestyle.
These small pots of herbs connected me to my food in ways I never expected. I now understand seasonality, plant care, and the incredible difference fresh ingredients make. Beyond the amazing flavors and savings (remember my $400 first-year savings?), I gained a deeply satisfying hobby that produces something useful every single day.
The most important thing is to start. Choose 2-3 herbs from the Big 5, get quality potting soil and containers with drainage holes, find your sunniest spot, and begin. Don’t overthink it, herbs are incredibly forgiving, and you’ll learn as you go.
That first successful harvest of herbs you grew yourself is an incredible feeling that will motivate you to expand and experiment. Before you know it, you’ll be the friend sharing cuttings and herb-growing advice with everyone you know.
Remember, you don’t need a green thumb, years of experience, or perfect conditions. You just need these five foolproof steps and the willingness to begin. Your inner gardener is waiting to be unleashed, and it all starts with that first tiny seed or cutting.
The herbs are calling. Your kitchen is waiting. Your garden adventure begins now.
Eat Clean, Grow Green!
Get Your Organic Living Mastery Bundle Here
Get instant access to my complete system that includes:
- ✅Introduction to Organic Living
- ✅The Foundations of Organic Living
- ✅Clean Eating Explained
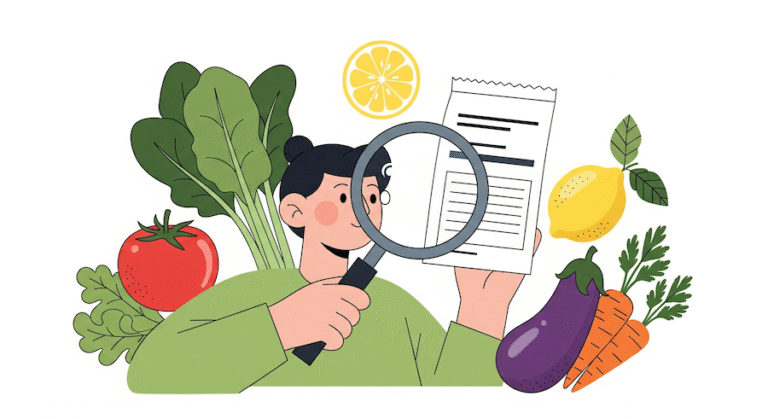
- ✅Decoding Food Labels
- ✅Grow Green. Start Your Organic Garden
Vipin Sawhney is a Tech Strategist and Marathoner exploring the “ROI of Wellness.” Read full story →